Setting up and verifying your SES account
The fastest way to get a new Amazon SES account ready to send is to run the onboarding wizard. It adds your sending email address and your sending domain in one pass and surfaces every DNS record you need to publish - DKIM, Custom MAIL FROM, and DMARC - on a single screen at the end.
1. Open the onboarding wizard
Go to the SES onboarding wizard in the AWS console. Pick the region closest to your subscribers - you can change it from the region selector at the top right at any time.
2. Add your sending email address and domain
Enter the email address you will be sending campaigns from (for example hello@yourdomain.com) and the domain you will be sending from - usually the same as your sending email address. Under MAIL FROM domain, set a short subdomain. We recommend m, which gives you m.yourdomain.com.
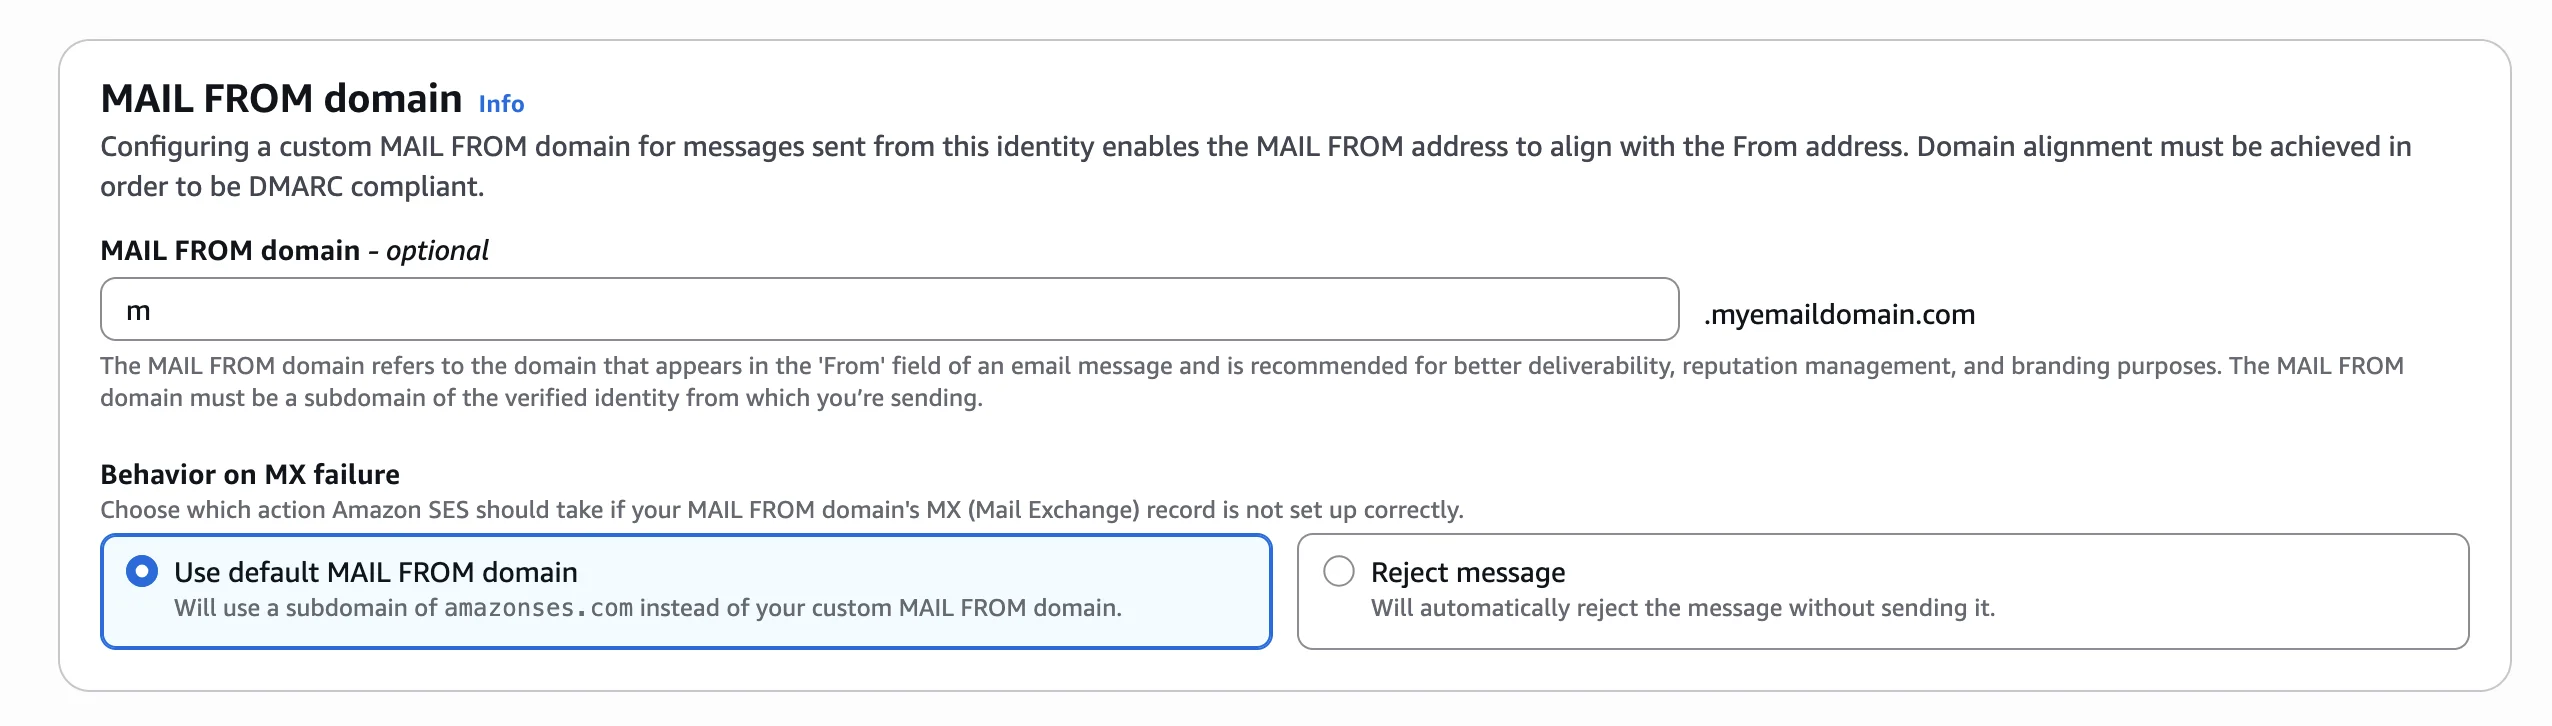
Using a Custom MAIL FROM subdomain keeps SPF alignment in good shape for DMARC and is the recommended setup for high-deliverability sending.
3. Choose your deliverability options
- Virtual Deliverability Manager - disable it. The feature adds $0.10 per 1,000 emails sent, and Mailblast already gives you bounce, complaint, and engagement reporting per campaign.
- Auto Validation settings - leave on. The $0.01 per 1,000 emails it costs is well worth it for catching deliverability issues before they affect your reputation.
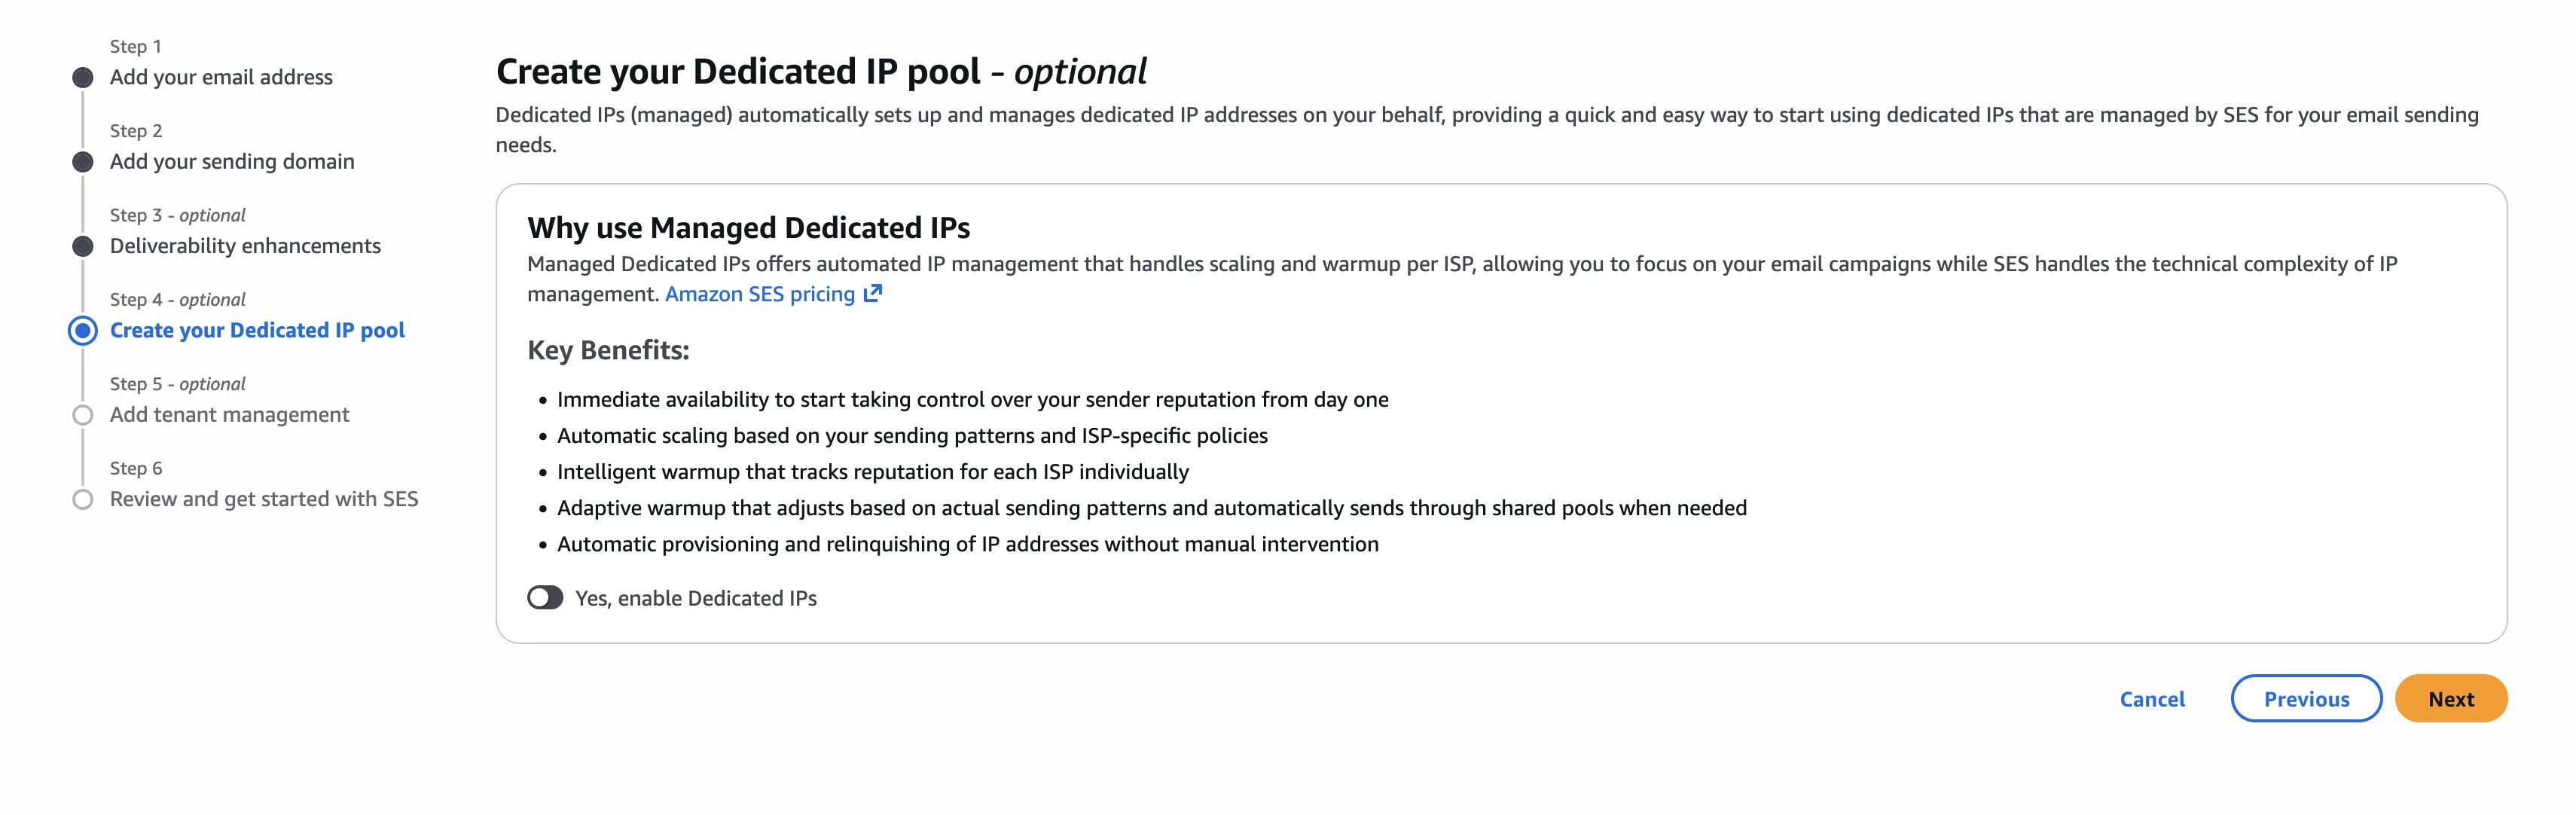
You can skip the Create your Dedicated IP pool and Add tenant management sections - both are optional and not needed for a standard sending setup.
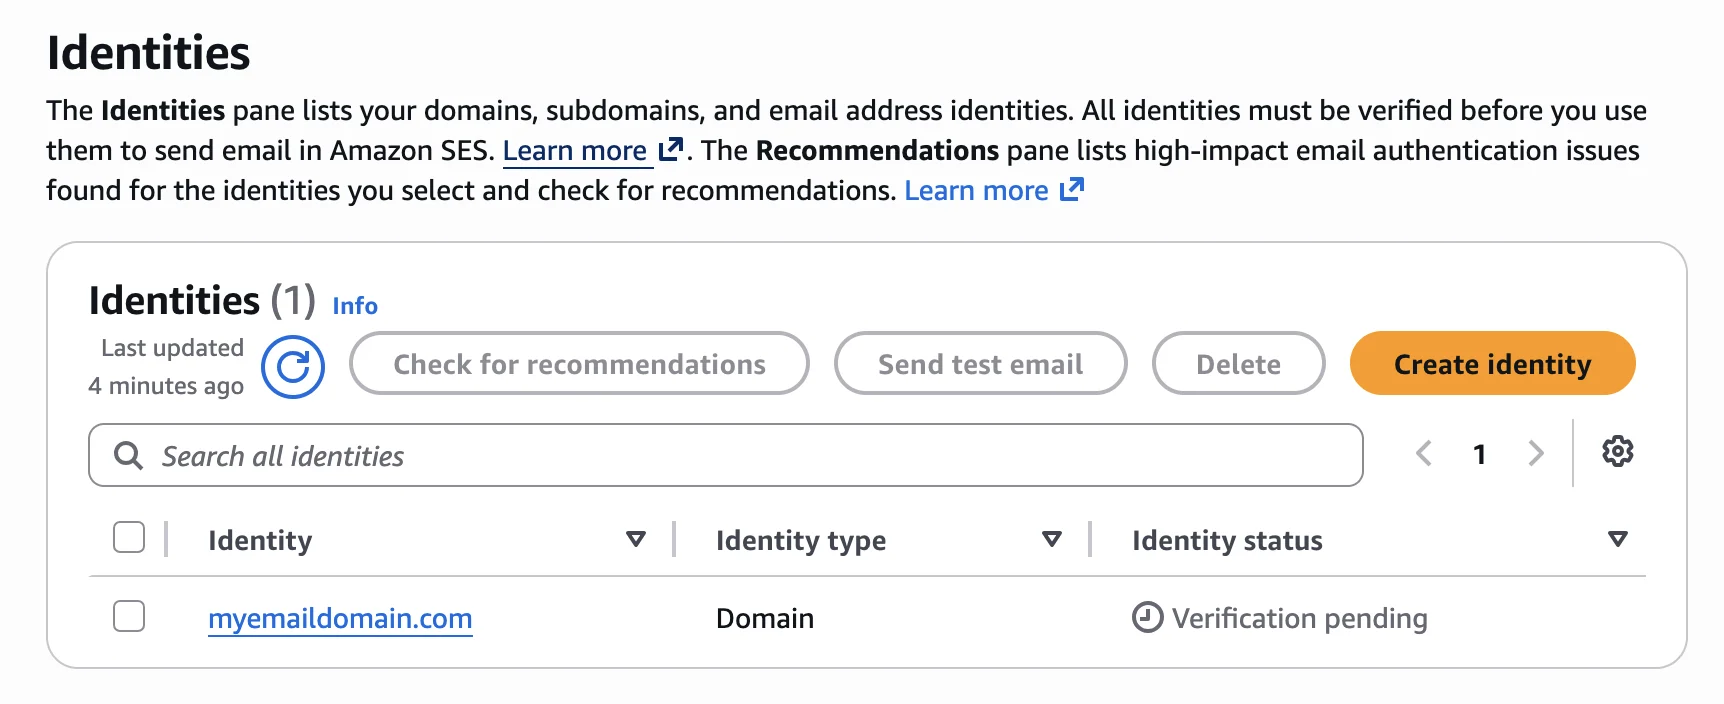
4. Confirm your identities
Once the wizard finishes, open the Identities page. You should see both your email address and your domain listed with Verification pending.
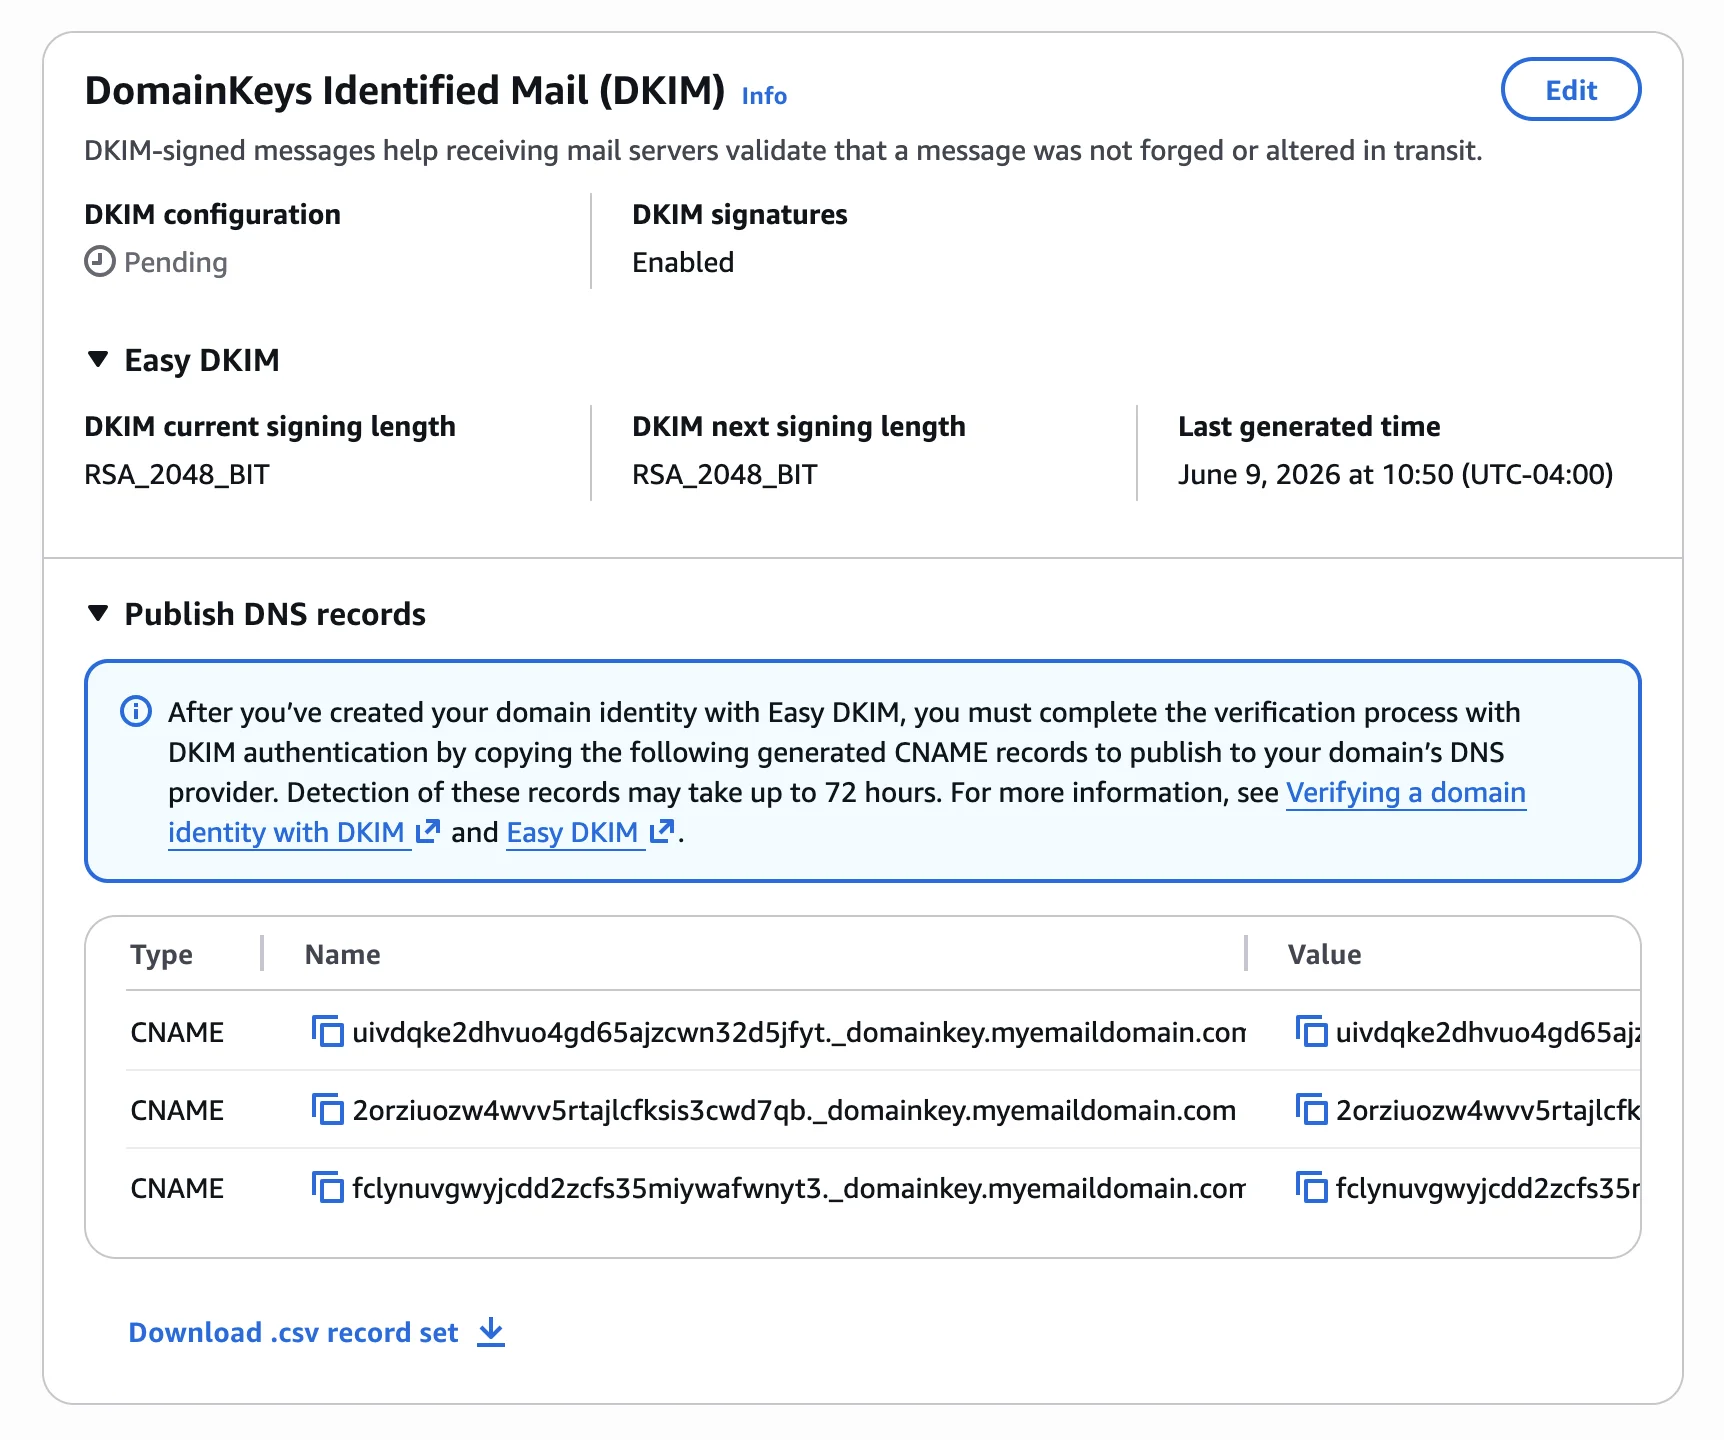
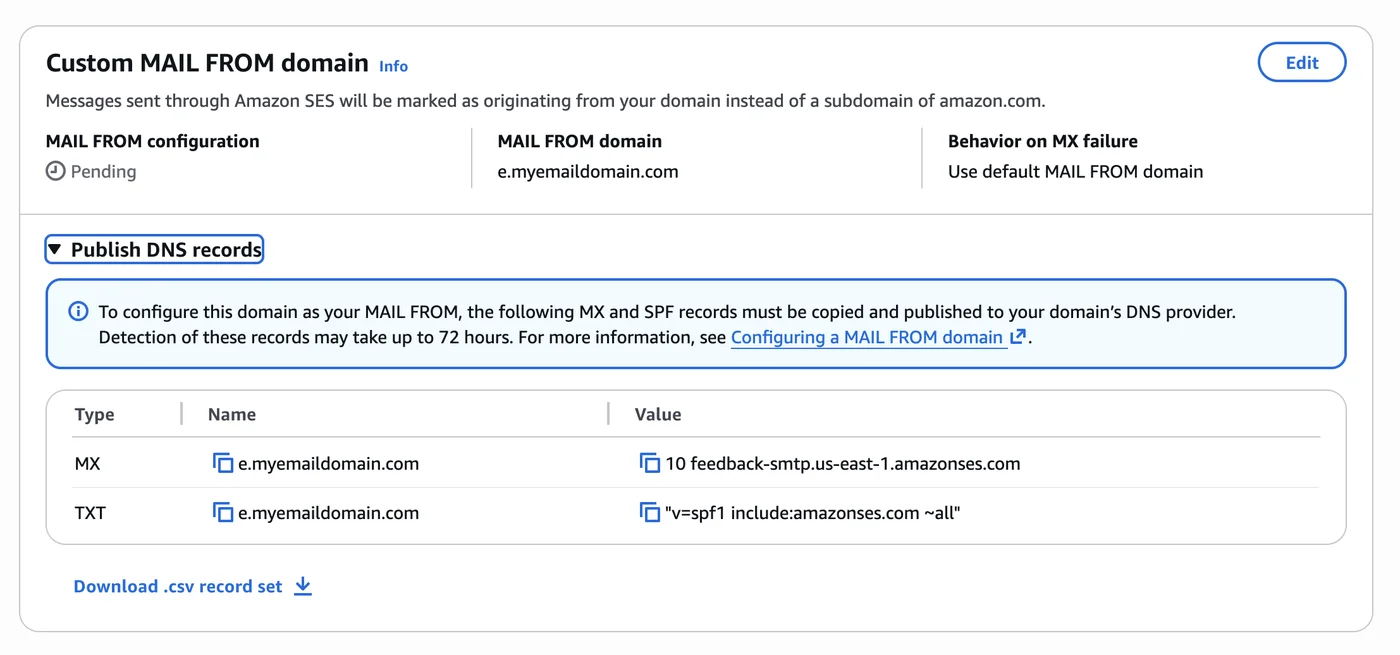
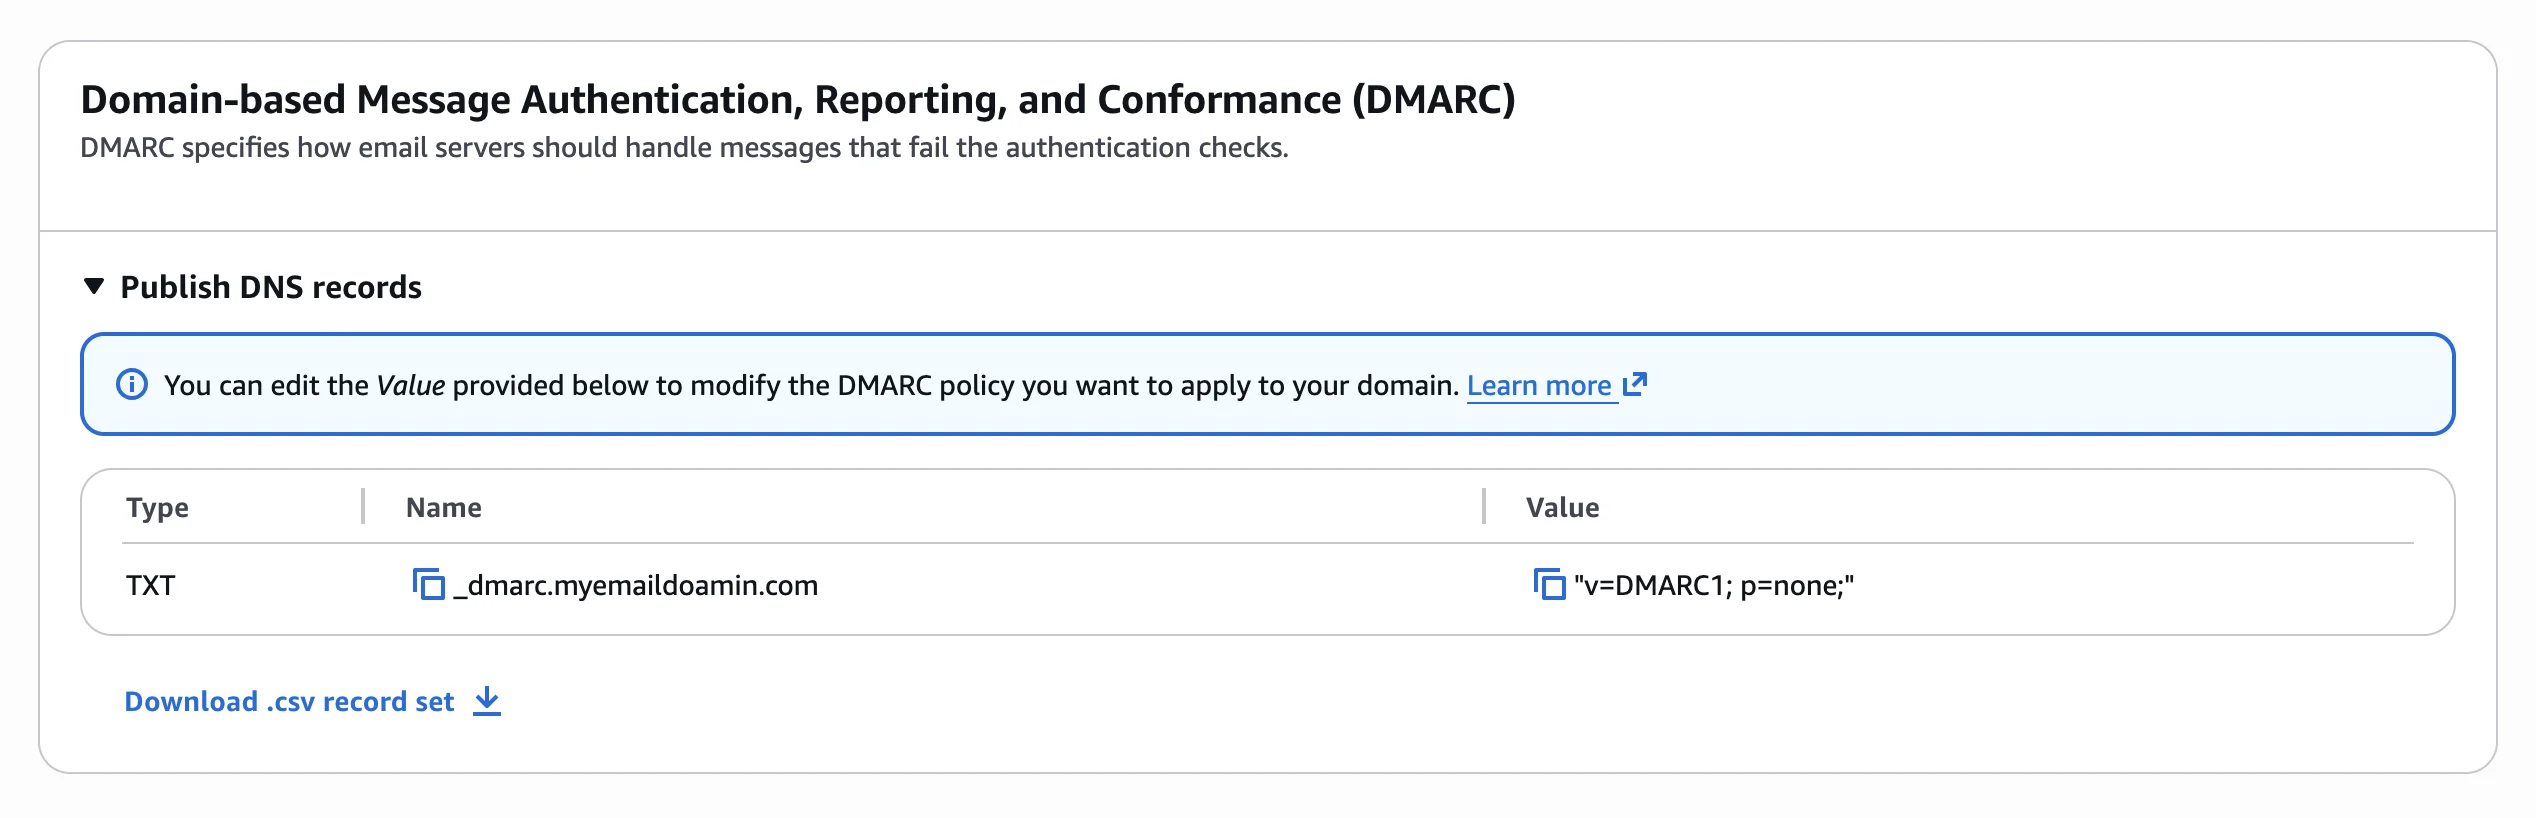
5. Publish the DNS records
Click into your domain identity. There are three sets of records to publish - all three live on the same domain in your DNS provider's control panel.
DKIM
Three CNAME records under DomainKeys Identified Mail (DKIM). These prove the email is signed by your domain.
Custom MAIL FROM
One MX record and one TXT record under Custom MAIL FROM domain, both on the subdomain you chose in step 3 (for example m). These let SES send from your subdomain and pass SPF alignment for DMARC.
DMARC
One TXT record under DMARC, on the _dmarc subdomain. This tells receiving servers what to do with mail that fails authentication, and is required for inbox placement at Gmail and Yahoo.
Most DNS providers expect you to enter only the subdomain part - omit your root domain because it is appended automatically. For example, if AWS shows the name as abc123._domainkey.yourdomain.com, enter just abc123._domainkey.
For more on choosing the right DMARC policy (p=none, quarantine, or reject), see Enabling SPF and DMARC.
6. Wait for verification
DNS propagation typically takes a few minutes but can take up to 72 hours. AWS will email you once your domain and email are verified, and the status on the Identities page will move from Verification pending to Verified.
If anything goes sideways, send us a screenshot of the records you added and we will help you get set up.