Creating your AWS Credentials
Even if you already have an AWS account you still need to sign up for Amazon SES. Go to the Amazon SES sign-up page and follow the on-screen instructions to sign up.
1. Create a permissions policy for Mailblast
We only need access to AWS SES and AWS SNS for email delivery and tracking.
Go to the IAM Create Policy page. Click the JSON tab in the policy editor.
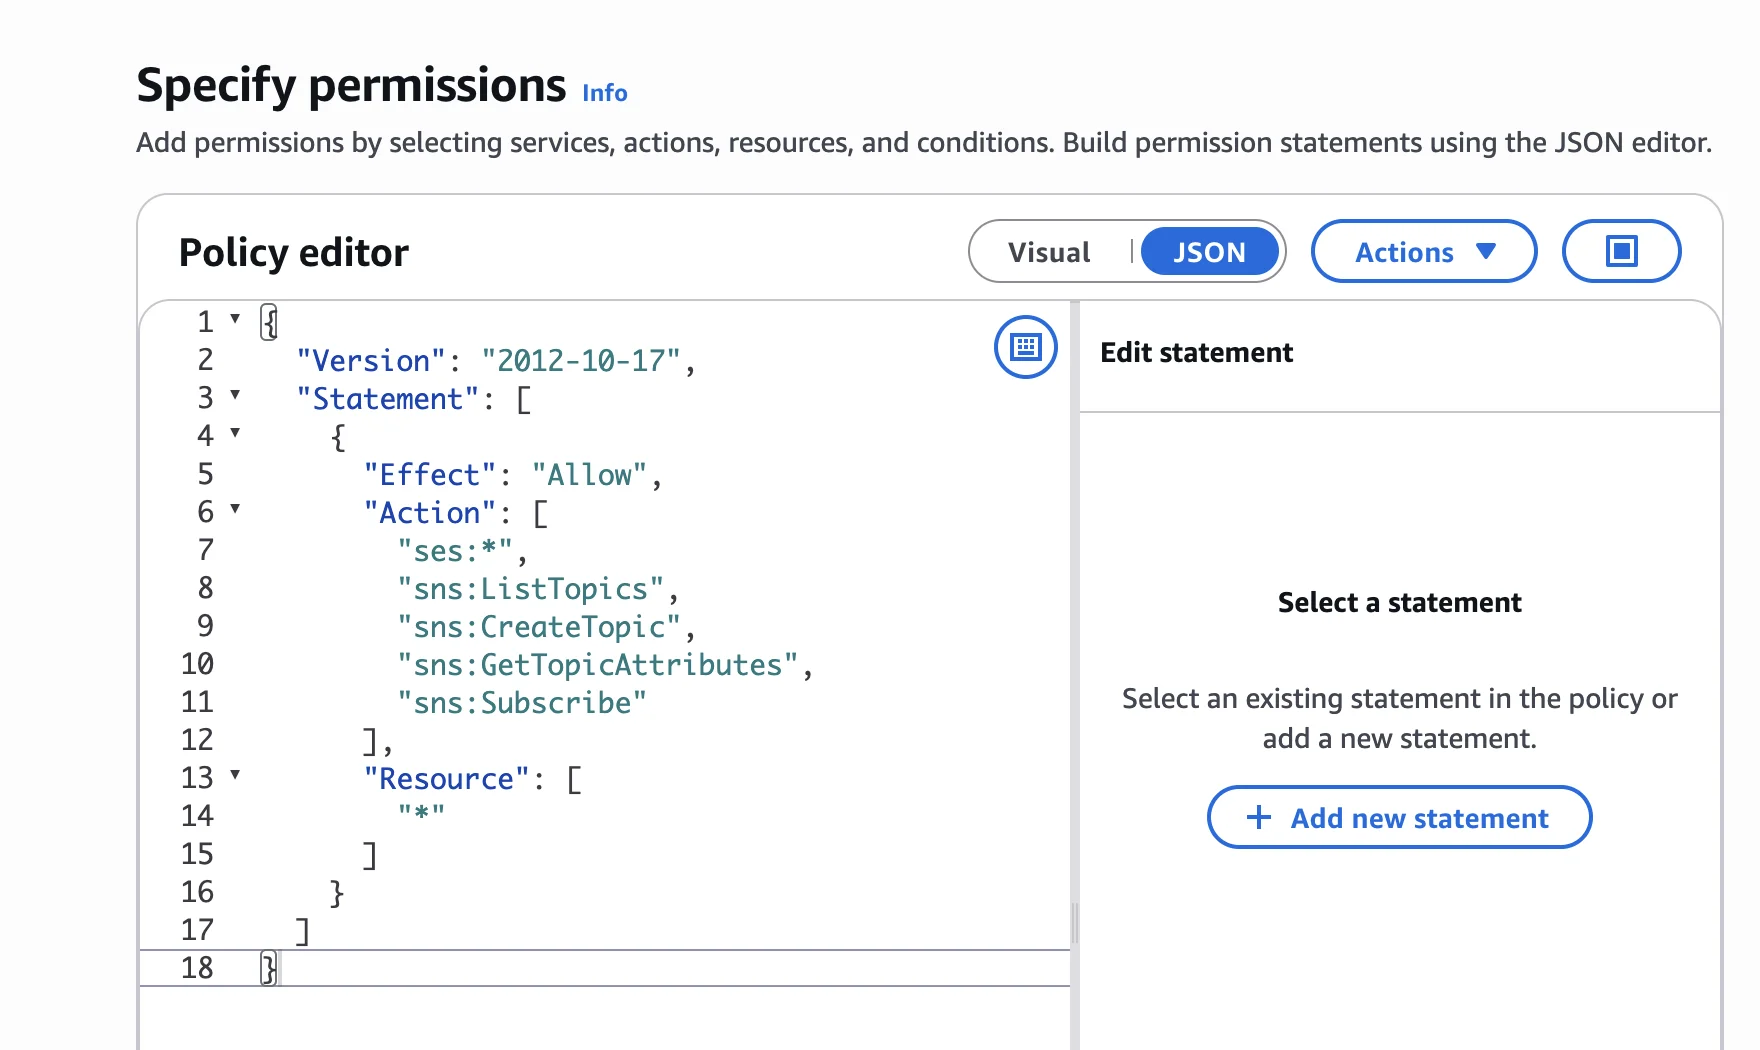
Paste in the following:
{
  "Version": "2012-10-17",
  "Statement": [
    {
      "Effect": "Allow",
      "Action": [
        "ses:*",
        "sns:ListTopics",
        "sns:CreateTopic",
        "sns:GetTopicAttributes",
        "sns:Subscribe"
      ],
      "Resource": [
        "*"
      ]
    }
  ]
}
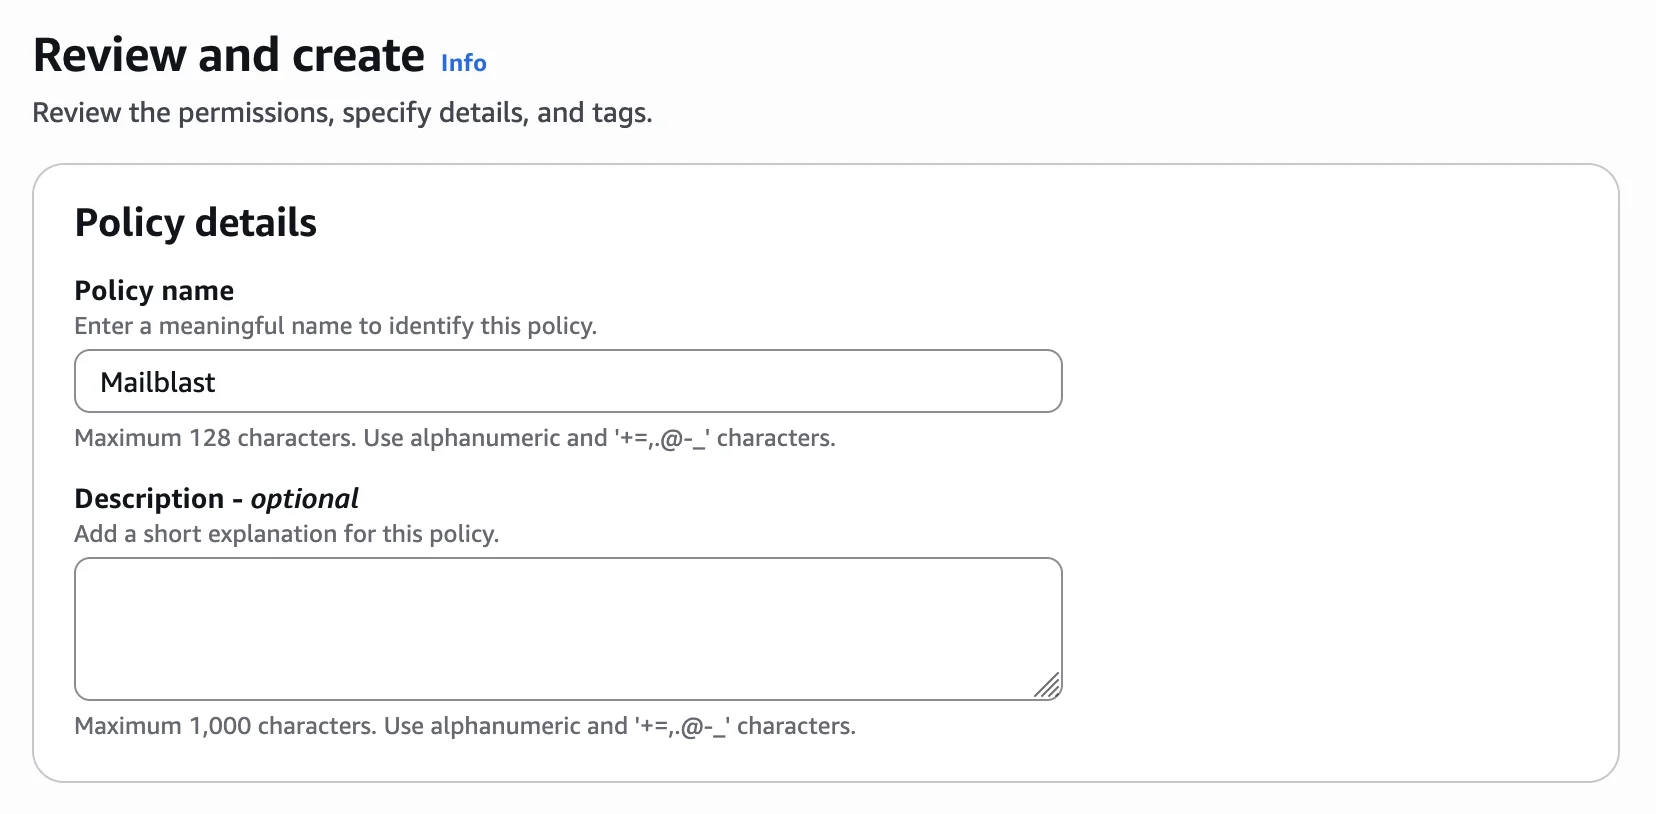
Click Next, then enter Mailblast as the policy name and click Create policy.
2. Create a new user for Mailblast
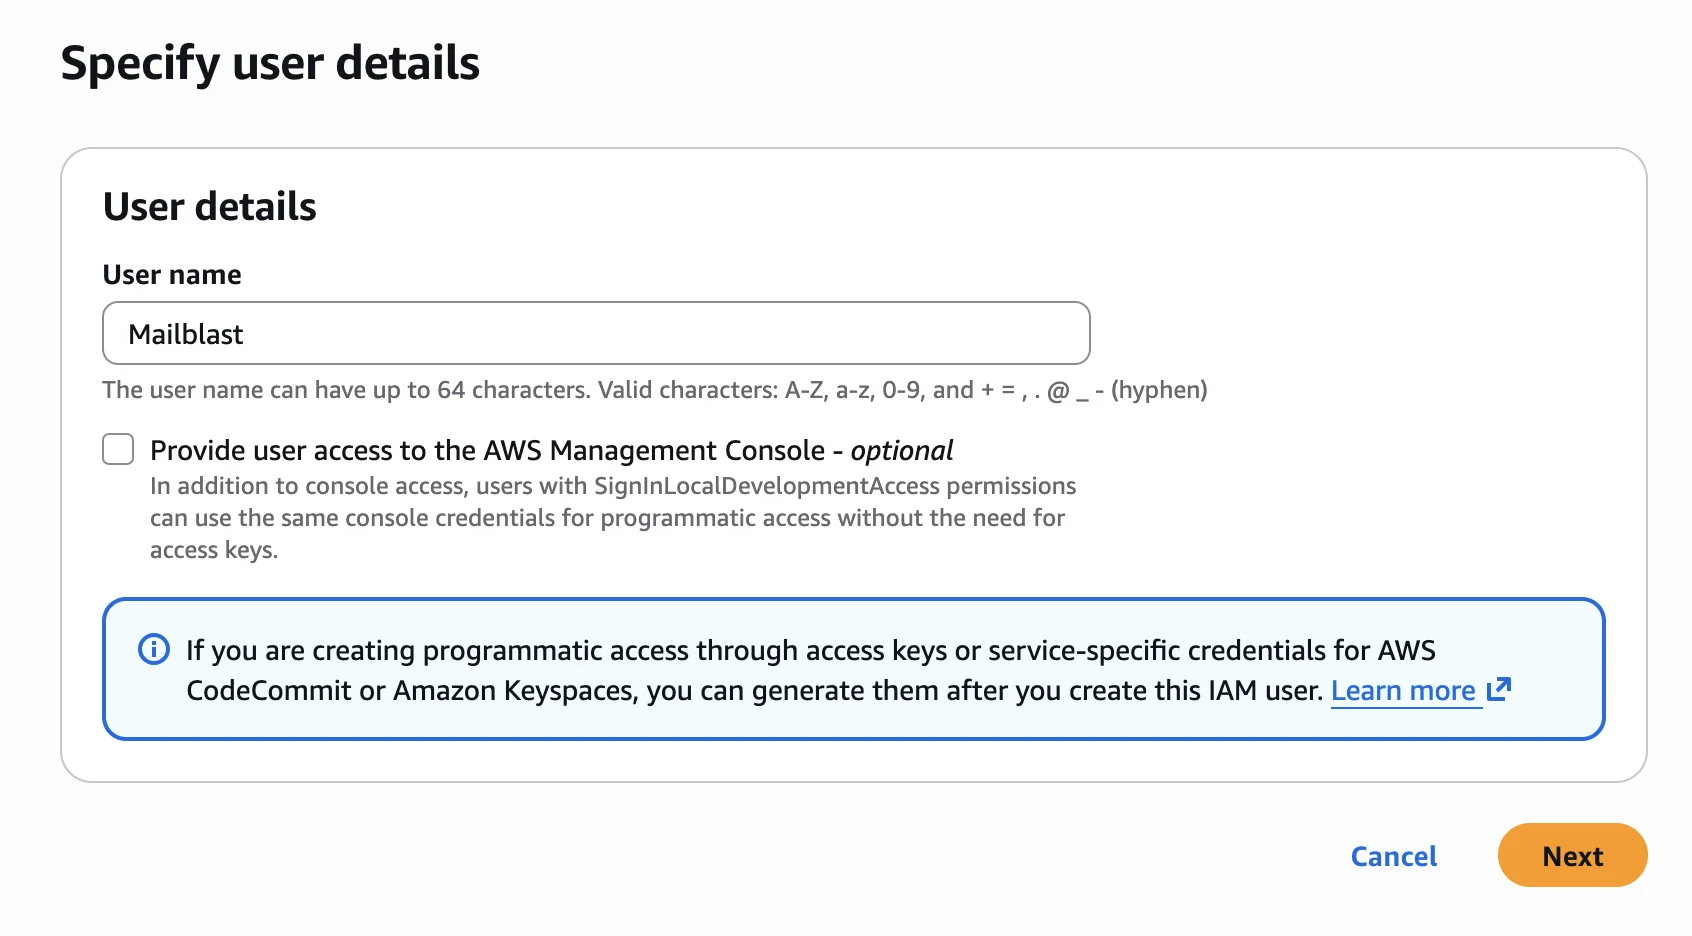
Head over to the IAM Create Users page and create a new user called Mailblast. Leave the console access checkbox unchecked - Mailblast only needs programmatic access via access keys.
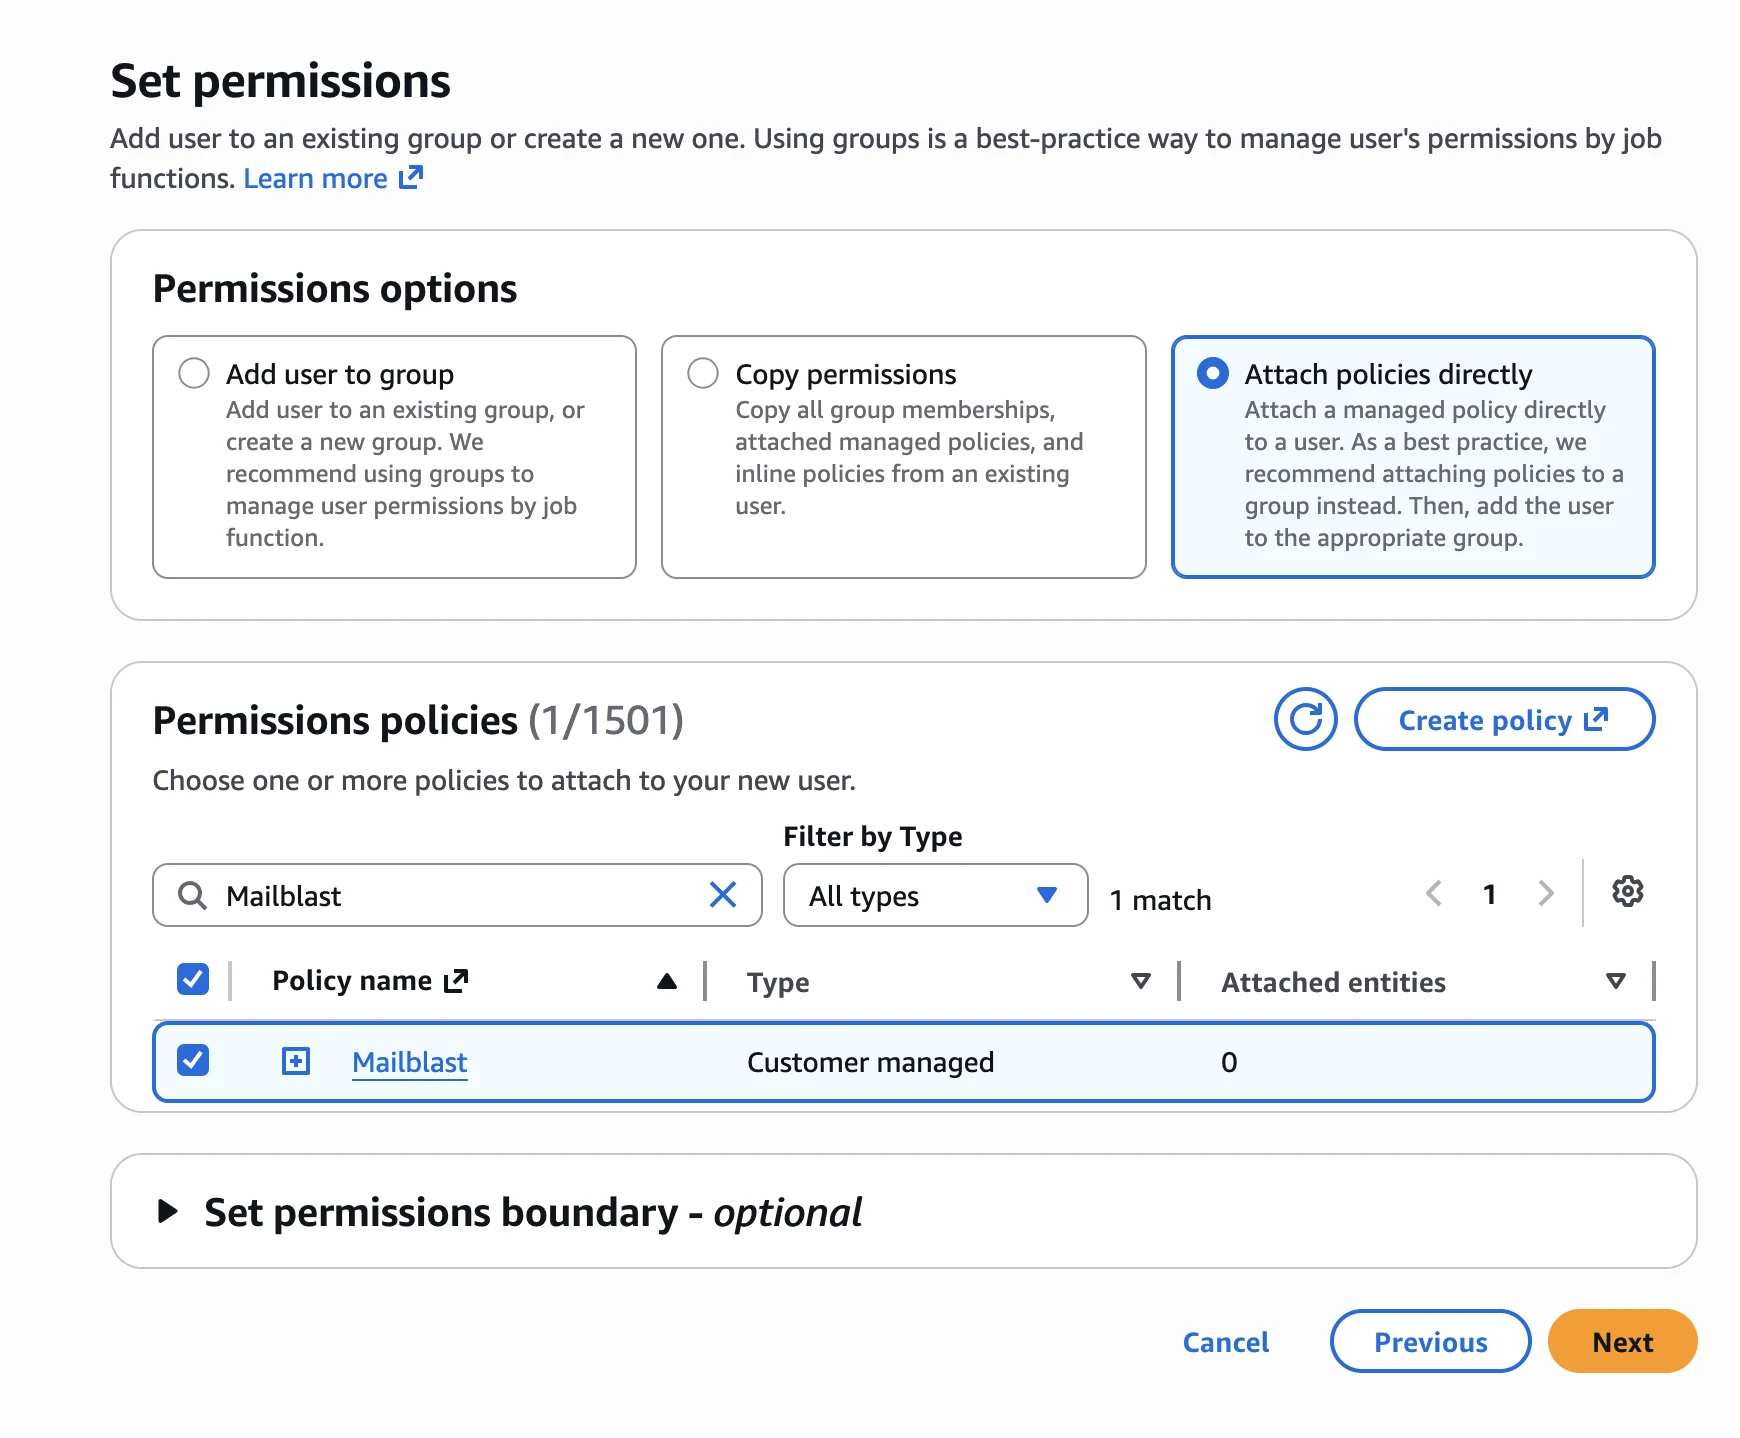
When prompted to set permissions, choose Attach policies directly, search for Mailblast, and select the policy you created in the previous step.
Once the user is created, open the user's detail page and go to the Security credentials tab. Click Create access key.
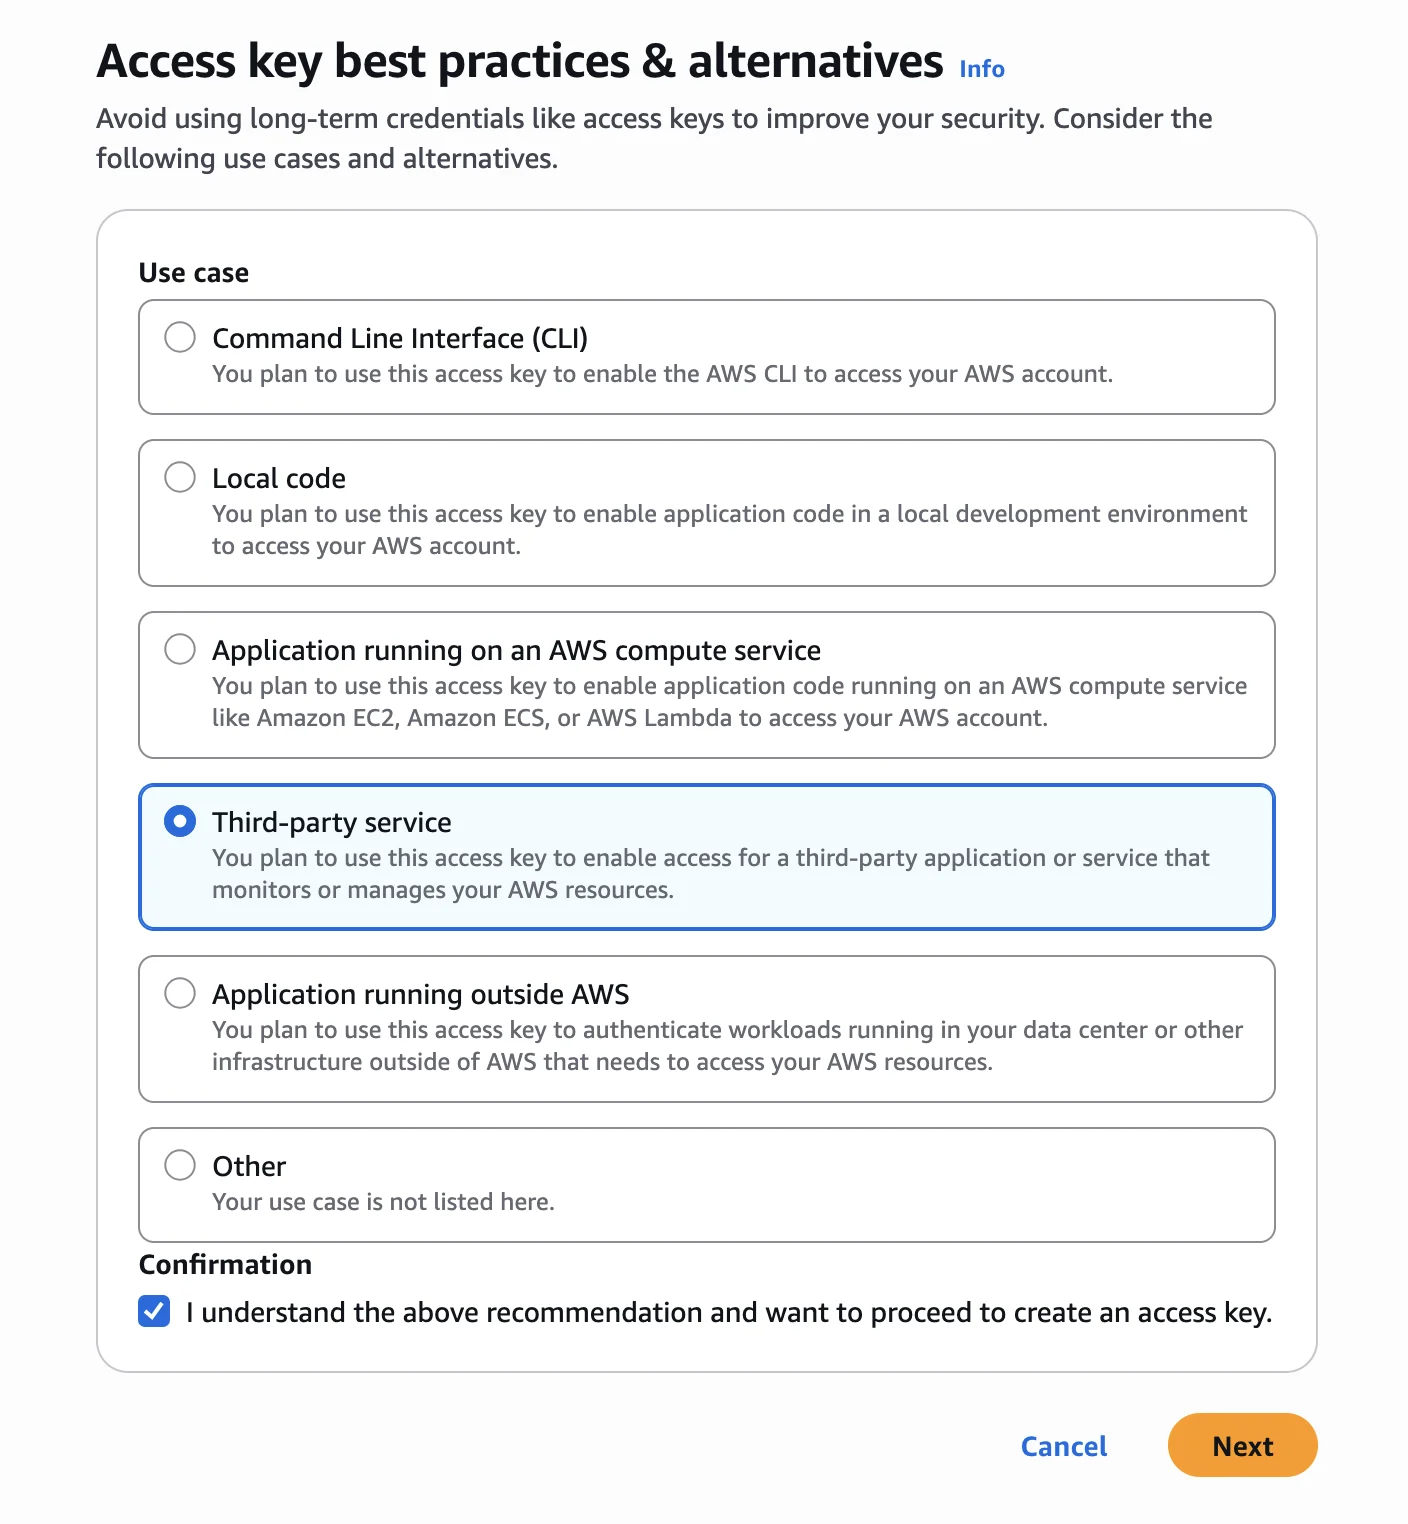
When asked to select a use case, choose Third-party service and check the confirmation checkbox, then click Next.
Skip the description tag field and click Create access key.
3. Configure Mailblast with your new credentials
You will now see the Retrieve access keys screen. Copy the Access key and Secret access key into the Mailblast AWS Settings page.
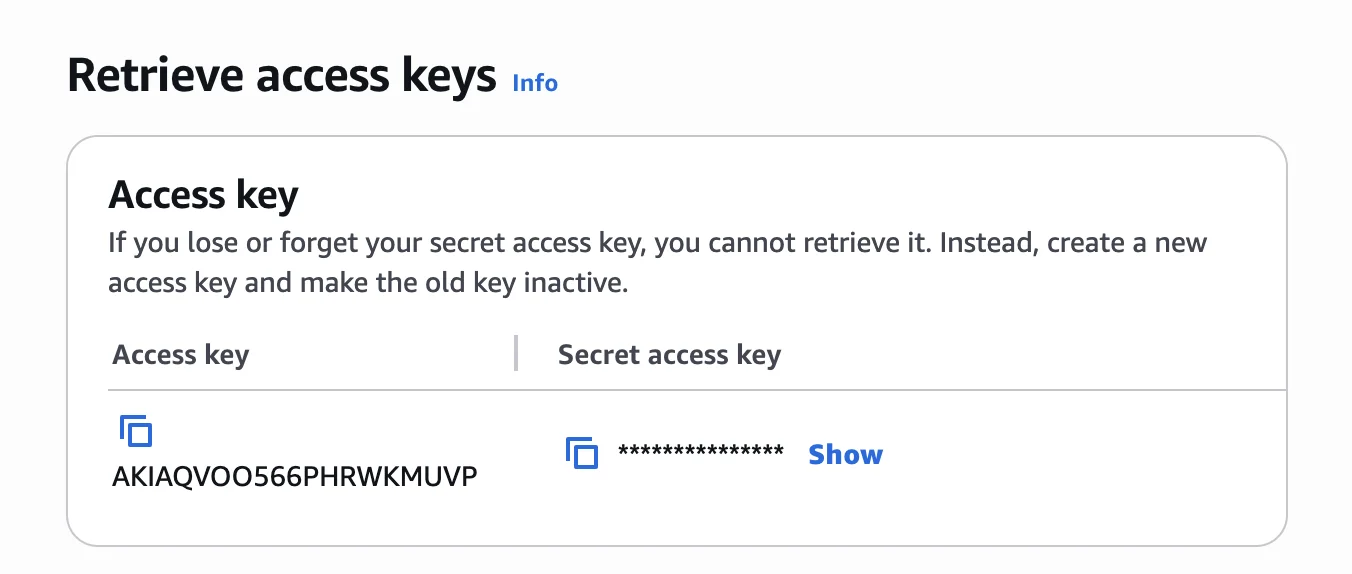
Keep your secret access key safe. This is the only time AWS will show it. If you lose it, delete the old key and create a new one.